I found this old thing on my hard-drive. Might help me get focused.
I think the obvious answer is a wetland because those environments were hardest hit buy farmers. Tho interestingly I do not know much about threatened wetland species. Our rivers and shorelines face a lot of commercial & recreational pressure. A wetland also sits at an interesting intersection:
When I visit forests I hear a lack of quality in the silence (lack of bird life)
When I drive through the countryside I see a lack of quality in the monotonous monocultures.
When I kayak in NZ, the water feels empty. I think for me — quality is biodiversity and the water is overfished and often polluted.
It would be magic if I could fill all three buckets with one hose.
The 2013 Marine Report Cards are in. These report cards are awesome. We have dropped from a D to an E. The water quality and ecology have gotten worse, but this has inspired TEEF who plan to get more active. Yay!
After initially asking the council to fence a gully at Pt England reserve to reduce erosion. I have since found NZ Dotterel and Shore Plover there.
Shore Plover at Point England Reserve
I taked to specialists at the Ornithological Society & DOC. Then today I did a Presentation to the Tamaki Estuary Environmental Forum. Everyone was very excited and wants to help.
Now I need to socialise some designs and forge ahead. It looks like getting permission and $ should be relatively easy.
Dumping. Another slip. The gravel below the high tide line.
I was looking for erosion sites when I saw Powerhouse Civil actually dumping material into Tamaki Estuary here. I will let Auckland Council know tomorrow.
UPDATE: (2 Weeks later) Rowan from By-Laws called me and is referring it to a pollution dept.
We need to extend the retaining walls in the Tamaki Estuary and I don’t want to have to lug a bunch of stone down there so I thought ‘what if we use the mud to make concrete blocks?’ It makes sense right? Use the product from the erosion problem (mud) to fix itself.
I got advice from a chemical engineer who thought ‘as long as I don’t use any rebar I should be ok with the salt water’. He also gave me a mix to try which I adapted to fit the local conditions:
10% Ordinary Portland cement
10% Mc Donalds fine lime
80% Mud
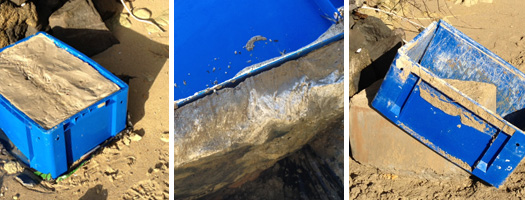
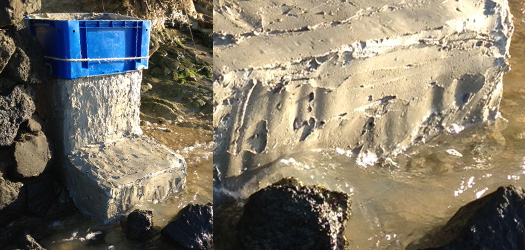
I premixed the cement and lime so I did not have to lug the 25 kg bags on site. I bought a 45 litre bolt box to use as a mould. I put the whole thing in a plastic bag to cure as I am working below the high tide mark (concrete does not need air to cure). Things I learnt:
Mixing takes ages, I was very thorough but this took an hour!
The first block will not sit on flat ground so you need to add more cement and lime (I did not have any more so I put a large stone in the middle of this block).
I tried to keep the mix as dry as possible for as long as possible. One advantage of this method meant I could pull any crabs out that I accidentally scooped up.
Multi coloured mud helps you monitor your mix. It looks like mine had a lot of clay in it, which makes sense given the eroding banks are clay.
Update 2018: Mudcrete is a thing
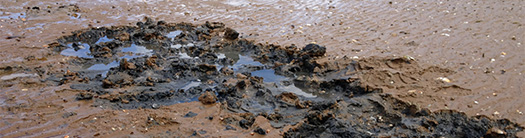
Here is where I took most of the mud. It will be interesting to take another photo of this spot in a month or two.
UPDATE: 5 DAYS
Well it filled in pretty fast!
UPDATE: 26 DAYS
Hard to believe I have taken 90 LTRs of Mud from this spot.
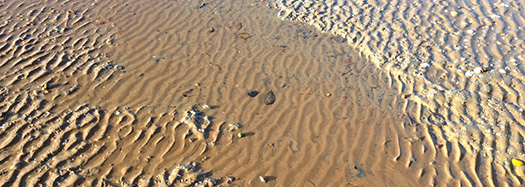
UPDATE: 3 MONTHS
Impossible to tell I have been digging here, even the layering looks the same to the un-dug areas.
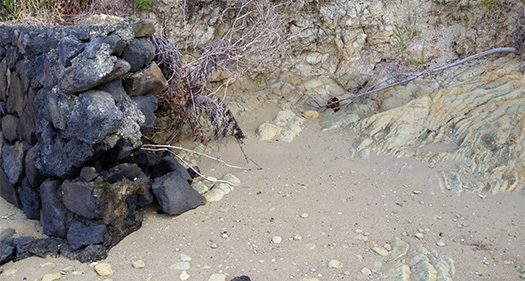
This is the location ( you can see how well the old wall has done ).
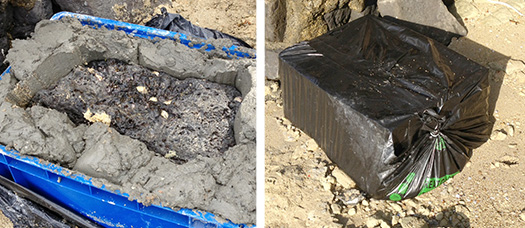
This is what the mixing process looked like. I cut the bag open and taped it up later.
One thing I quite like about this mix is the lime, which is a much more environmentally friendly product than cement. Tho the engineer has told me ‘If it’s not strong on compressive strength, increase the cement and reduce the lime’.
Here is the rock before I covered it. And the whole thing sealed up ready for high tide.
Let’s see if it turns into a rock or not. I am optimistic because of the clay but I am worried because concrete is usually made of sand. The engineer reckoned it might take a month!
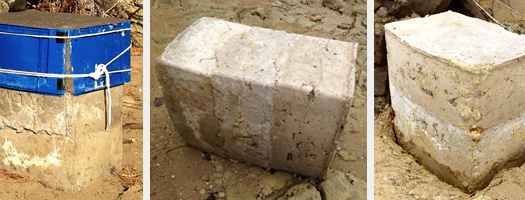
UPDATE: 18HRS: Its solidifying! It feels like brand new plasticine. My 30kg son was able to stand on the block without leaving much of a dent. The bag has worked well and I am confident if it came off now the impact from the sea would be negligible.
UPDATE: 9DAYS
1 Plastic off. 2 Bad mixing (I will mix outside the box next time). 3 I had to saw the bolt box off.
Ideally I would find a way of sliding up the box without having open it up. The second block is better mixed than the first one (it also took half the time). The mud did not look different, but most of it was infill from the small hole left by the last brick.
UPDATE: 48HRS After Mixing
Second brick removed from the mould a lot earlier, some areas a lot harder than the previous brick others still a bit soft. It will be interesting to see how it handles the ocean at this age.Parts of it look very white.
UPDATE: Third Brick
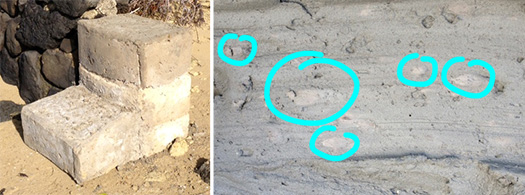
Made it even faster this time. I also dug in some footings (1 brick high).
When I pushed it over it did not break up at all! Even tho the top brick was still very soft at only 5 days old. The bottom bricks are rock hard.
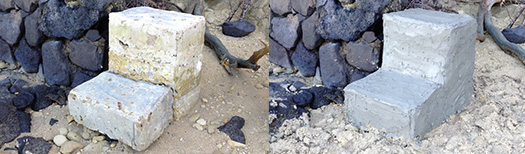
UPDATE: Fourth & Fifth Bock
L shape should help with wave erosion. Clay like lumps in my mix.
This is all I need to do for the experiment but I am keen to go one or two blocks higher. I was short on time doing these last blocks so the mix was not that good, I am worried the sea will eat them away leaving me with swiss cheese bricks.
UPDATE: Icing
It’s been 3 months and the blocks have held together against the sea no sweat. The swiss cheese does not look good though so I have added a coat of 20% PC, 20% Lime, 60% Mud.
UPDATE: Infill Brick
New brick made from 60% softer mud (infill). Also the bottom brick at high tide.
UPDATE: Another wall
I found this wall on the otherside of the estuary. It has been made recently as part of a Rotary/ Council funded walkway. It has large chunks in it and although huge seems softer than my mix.
UPDATE: 7 Months later
View from above at High Tide. I have added another thin layer 50% cement & lime and 50% mud to the top two bricks.
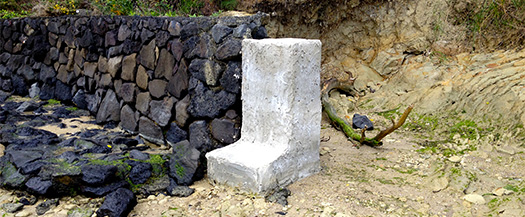
UPDATE: 8 Months later
Finished! Apart from a few cracks on the top I am happy with it.
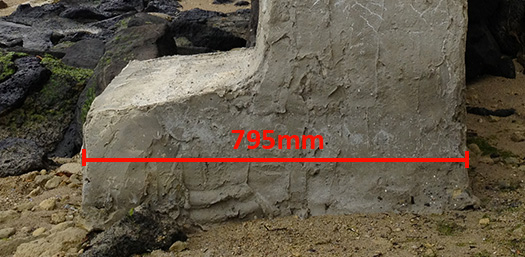
The base is about 795mm deep. I am looking forward to measuring it over the next few years.
UPDATE: 3 Years 5 Months later (August 2016)
It’s so ugly!
The front bit has broken off, probably from people walking on it when the supporting mud it was sitting on got eroded away (I should have built a footing). It has stood up surprisingly well to erosion, the front bit is 390mm and the back 375mm a total of 765mm. So it’s loosing about 0.8mm per month. It’s in the waves for at least two hours per day. Not bad for a first try, and a heck of a lot better than the bank behind it! It’s kind of nice to see algae growing on it, I think I would like to find out if bivalves will grow on it if I moved it (maybe just the broken off bit) further out into the estuary. Bivalves might also help prevent it from eroding. I think this kind of mud sequestration is a great way to deal with legacy sediment, I want to create more prototypes.
UPDATE: 6 Years later (February 2019)
The rate of erosion seems to have slowed down a lot.
Little shag roosting. November 2020. Photo by David Doleman.Note scouring at foot. August 2021
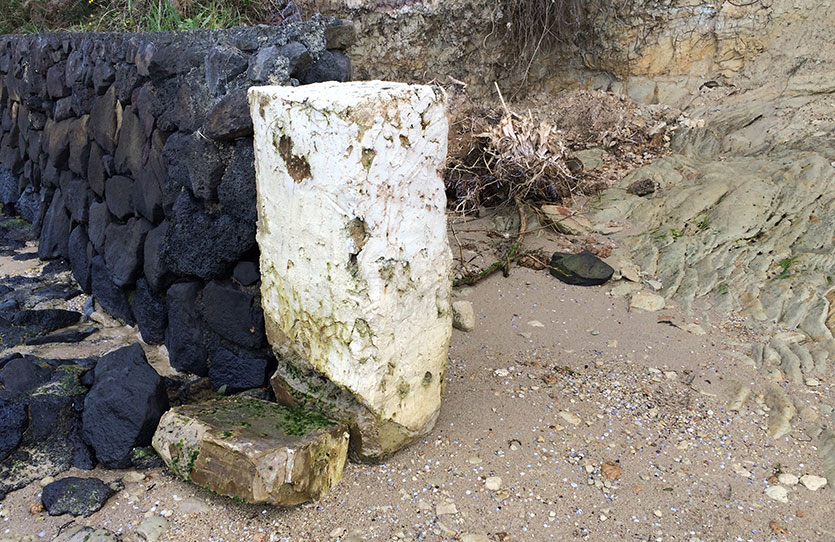
UPDATE: 10 Years later (February 2023)
The marine mud bricks finally fell over during Cyclone Gabrielle but are still working hard to reduce erosion.
After a very muddy swim, my son (8yrs old) and I have started mapping local erosion areas. It looks like there are lots of obvious places where we can fix tracks, plant trees and build retaining walls. I would like to help get the silt and mud out of the Hauraki Gulf.