Pest monitoring Selwyn Bush 2019

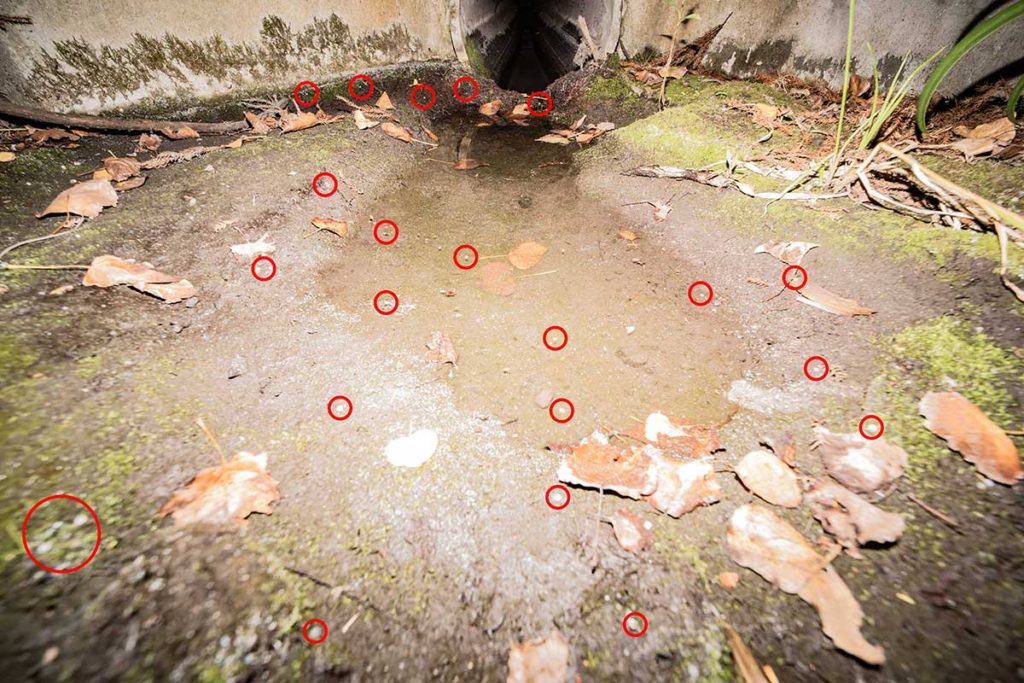
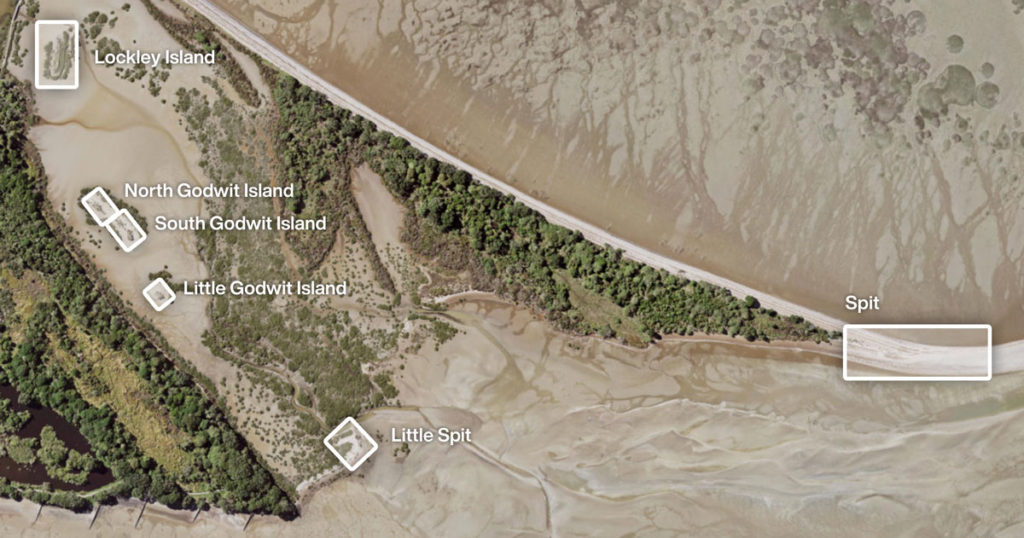
We identified 19 tracking locations (S1-S19) in 2014. The first 10 (S1-S10) were used in this survey. The survey was repeated in March 2019. The first 10 locations were searched and three out of 10 tracking tunnels were found. Seven new tracking tunnels were installed on the 10th of March. On the 16th of March another 9 tunnels were installed and all the tunnels were filled with an inked tracking card with peanut butter in the middle. Some locations were adjusted to make access easier. I noticed when trying to find the tunnels again with the Garmin InReach and App that the positions were often off by up to 16M. Thats a lot in the bush!

Locations of the 2014 tracking locations compared to the actual locations of the tunnels placed in 2019.

RESULTS

I find these mashed up prints very hard to identify, but here is my best guess:

S1 Hedgehog
S2 WW, Rat, Hedgehog
S3 Rat, Hedgehog
S4 Hedgehog, WW
S5 –
S6 –
S7 Hedgehog
S8 –
S9 –
S10 –
S11 –
S12 –
S13 –
S14 –
S15 –
S16 –
S17 –
S18 –
S19 –

WW = Winged weta, I was particularly looking for this species. See my blog post on tracking winged weta here.

Suspected winged weta tarsal pad print

I think we should probably ignore the tracking tunnels put out recently (S11-S19) as they may have been avoided due to (at at least some of) the target species being neophobic.

This would give us a result for 2019 of 20% Rat, 0% Mice, 50% Hedgehog. This indicates we have less rats & mice and more hedgehogs than 2019.

I have left the tunnels out there, it might be a good idea to retry in a few weeks. It’s interesting that we see more pests near the top of the bush, this has been observed before.

KMZ file with locations

My macro setup Jan 2019

Updated from 2017. I have upgraded to some second hand 600EX RT’s, a radio transmitter, 3rd flash and some custom designed and 3D printed soft boxes. Files uploaded here. The soft boxes are printed using transparent PLA which has a natural frosty finish and produces lovely diffuse shadows (0.2mm @ 5 layers). I painted them black & yellow and lined the mouth with black tape so as to not scratch the flashes. The 600EX-RT’s are quite heavy and I had to use epoxy glue to re-enforce the cold shoes. I fibreglassed a giant nail to the base of a Manfrotto monopod to create the portable outdoor light stand.

Example photo of a native wasp (Netelia ephippiata).

Red-billed gull decoys

I was recently asked to quickly create some red-billed gull decoys. I joked they might be better of using a decoy picnicker but the reality is this is another native species that is in real trouble (conservation status declining). I posed the decoys with their tails up but with legs so they could be used standing or sitting if they need extra anchorage.

Unfortunately these decoys were snapped off at the leg, we are not sure how, as it would involve a lot of force. So…

I made some more, these have been redesign to bolt on to a 1M long 8mm diameter threaded rod.
Here is what they look like installed. We dug holes in the ground and used a little cement to lock them into place. Fingers crossed they work.
Photo by Paul Kennedy
Photo by Tim Lovegrove.

Update October 2019: Win!
Note that the Northland Region Corrections Facility is making wooden Black-billed Gull nesting decoys, I don’t know how much they cost but they look cute!

A great article on the Wynyard gull colony project has been published here. Another one by Boffa Miskell. Ohhhh and another article in the Guardian!

Tracking winged weta

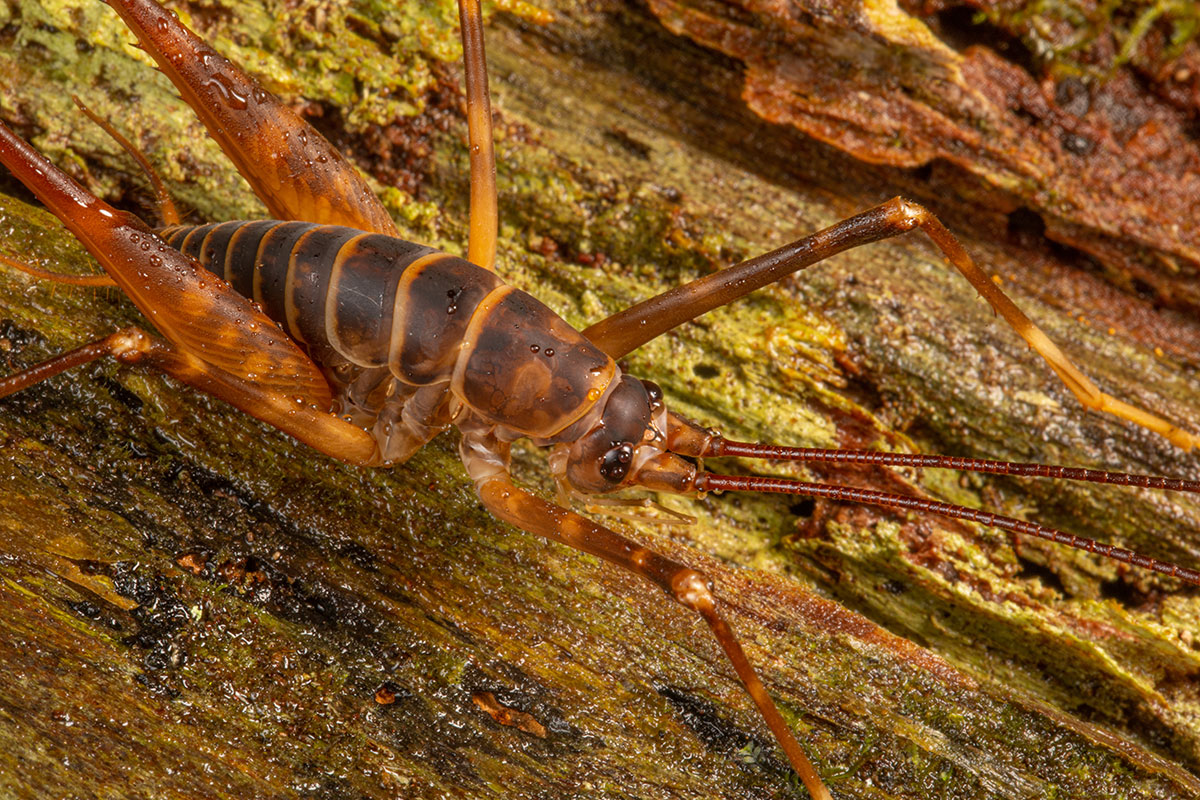
I first noticed ‘winged weta’ in 2016 when I took this photo of a pterapotrechus moulting. They are particularly abundant in Selwyn Bush, Kohimarama where community groups are doing pest management and restoration. I wondered how many times introduced winged weta were being mis-recorded in tracking tunnels as our native weta. No foot prints have been recorded to compare so my son and I collected six (males and females, small range in sizes) in less than five minutes. We dropped them onto a board with footprint tracking ink, photo above.
Here are some closeups of the hind leg footprints.

The footprints look very distinctive to me so we probably don’t have to try and understand walking pattern (see ‘Footprint Identification of Weta and Other Insects‘). I think this must be because the tarsal pads are paired for winged weta and not in native weta. This will make identification of winged weta quite easy going forward.

3D printing replicas for a museum

This was my most challenging project for 2018. After reading about the New Zealand Fairy Tern decoys I was making, the Mangawhai Museum approached me to make them some replicas. As there are only 40 of these birds left in the world they were never going to be able to get a taxidermy one for an exhibition.

I was very ambitious and decided to create a feeding scene where the male is landing with a fish in his bill. This was very challenging and I really pushed my printer to the limits and discovered a few new tricks in the process. I think this kind of model making has advantages over taxidermy where the models can be designed to exhibit a wide range of behaviours. It will be interesting to hear how the public react.

Freshly planted mussel bed

Mussel bed on hour old

I think this is the worlds first photo of a freshly planted mussel bed. Altho I have been to most of Revive our Gulf’s deployments (including the first one in 2013) we have’t dived on them straight away. After taking this photo I deployed three time-lapse cameras to record suspected predation (I was happy to discover none). I also photographed a nearby bed that was laid a week ago where the mussels are standing up and had knitted together. It would be interesting to know how long it takes them to jostle into position.

Volunteers shoveling mussels

Mussel bed one hour old

3D printed stencil

I tried 3D printing this stencil for a penguin box so I didn’t have to cut out the letters. 5 layers at .2mm PLA. It worked great and the thin lines come out really well, but you can’t leave the stencil in the sun or it warps!

Night counts

I have been counting a lot of birds lately trying to build a solid picture of how the shorebirds use the Tāmaki Estuary. In addition to regular wader counts I decided to try and also count them at night as they might use the roosting areas differently. After testing various devices including long exposure photography Pieter and I decided on expensive gear to do the survey, I bought a Luna Optics LN-DM50-HRSD Digital Night Vision Monocular (example image above) and Pieter purchased a Pulsar Helion Thermal Imaging Handheld XP38. Using these devices helped us count the birds without disturbing them which was quite important to us. Details of the trial here Tamaki Estuary shorebird survey – Wildlands.

The feeding observations were really interesting. Tho in regards to extra light – it was disappointing not to find shorebirds at Mt Wellington War Memorial Reserve where I found banded dotterel and flocks of SIPO at night last year. The reserve now has large lights for playing sports in the dark.

I think the trial study has given us enough data to understand how the shorebirds use the estuary at night. More detail would be interesting but is unlikely to affect future management decisions. Here is the Raw data. I plan to keep a better eye on the Pakuranga Sailing Club and include the data in a report to Council on roosting in the Tāmaki Estuary.

== SUPLEMENTRY NOTES ==

Access to viewing points was limited because we wanted to do the survey without disturbing the birds. All the waders identified were more easily scared at night with the exception of the mixed flock at the Pakuranga Sailing Club that was unusually calm in our presence (both day and night). Day counts followed the limited routes of the night counts for consistency, however a few birds were often seen during the day that would have been hard to see at night from the same vantage point.

No variations in flock shape were observed between day and night. The main thing that correlated with flock shape was if the SIPO were feeding. The SIPO flock spread out over 100m in diameter when feeding at Point England both on the sportsfeilds (at night) and the paddocks (during the day). The pied stilts were always grouped closely together.

I think the roosting patterns look like waders are primarily avoiding disturbance. Wide open spaces with no obstructions or light were preferred… maybe close to the water too – especially for the smaller waders? Seaside park a good example – I was surprised to see SIPO there at night. The lack of birds at Mt Wellington both Day and Night in 2018 vs 2017 is odd. Maybe the addition of the lights has also reduced the sites daytime roosting function.

I totalled the counts for SIPO and Stilts to see if there are variations in the total day vs night numbers. We are short 22.5% on SIPO, I feel like we would not have been that far off and some birds are heading elsewhere to roost, it’s not a huge number tho. I am sure we missed some birds tho, for example during the day the NNZD at Point England are so much easier to spot than at night.

Australian fairy tern decoys

After talking about my New Zealand fairy tern decoys I was approached by Australian conservationists about making decoys to attract Australian fairy tern. Although they are the same species they have brighter beaks and shorter eye patches so I modified the paint job a bit. The biggest difference between the sub-species seems to be that they flock together to nest. I imagine this will make the decoys more effective for this subspecies.

I lowered the design so it looks more like they are incubating, hopefully they will still turn into the wind ok. Photos below of the birds without spikes above and below.

PLA coated with two part epoxy resin then blasted with heat gun.

We’ve had some problems with these decoys, the black painted parts get so hot in Western Australia that the plastic melts leaving the decoys with flat hair cuts! The glass transition temperature for PLA is around 60° C. I tried covering some PLA with two part epoxy resin then warmed it up to try and simulate the issue. The epoxy worked well holding the form in shape even when I got it so hot the surface burned. However it did deform a little with bubbles and spilts, this might work as a patch up job but its not ideal, other ideas:

1. Changing the plumage to be less black (juvenile)
2. Printing with more infill (thicker heavier decoy)
3. Printing with another plastic
4. Creating moulds and using resins

I really like using PLA because it’s biodegradable and from a renewable resource but in this situation it just might not be up to the challenge. Common filament options are: ABS (won’t print with as good detail), PET (not glue-able) or Nylon (which has a lower glass temperature). I could print with plastic that has better thermal resistance like Polycarbonate, or print using dissolvable supports and no glue with something like PET but I would need a much more expensive printer. Unfortunately I think heat resistant decoys are going to be less environmentally friendly and either expensive or labour intensive 🙁

Update May 2019

Re-designed test decoys

I have made three new decoys to test, all are glued using two part epoxy.

  1. 40% infill and two coats of epoxy resin
  2. 20% infill and two coats of epoxy resin
  3. 40% infill

The numbers 1,2 & 3 are carved into the newly designed peg which is shorter but more heavy duty. The increased infill makes all of them heavier, this should help keep them down when the sand moves, if that does not work the painted legs should look more natural. The overall design of this decoy is a little more robust, it has it’s head ‘terned’ a little to help distinguish it from the other decoys I have made.

Update Dec 2019
These decoys were deployed from 3 Nov-20 December on Garden Island. They did not attract the target flock which nested elsewhere. With three of the days being in excess of 37 degrees the decoys got tested pretty well and show no signs of melting or splitting. They have been deployed in the researchers garden for further testing 😀

Photo by Claire Greenwell

Update April 2020

Decoy 2 developed a minor crack in the join, it was the weakest decoy with half as much infill for internal strength. No changes to the other two.