The 2013 Marine Report Cards are in. These report cards are awesome. We have dropped from a D to an E. The water quality and ecology have gotten worse, but this has inspired TEEF who plan to get more active. Yay!
Pt England Reserve
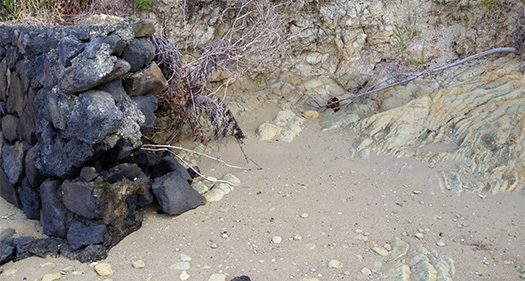
After initially asking the council to fence a gully at Pt England reserve to reduce erosion. I have since found NZ Dotterel and Shore Plover there.

I taked to specialists at the Ornithological Society & DOC. Then today I did a Presentation to the Tamaki Estuary Environmental Forum. Everyone was very excited and wants to help.
Now I need to socialise some designs and forge ahead. It looks like getting permission and $ should be relatively easy.
Powerhouse Civil

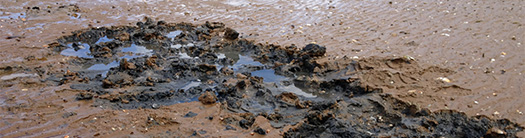
I was looking for erosion sites when I saw Powerhouse Civil actually dumping material into Tamaki Estuary here. I will let Auckland Council know tomorrow.
UPDATE: (2 Weeks later) Rowan from By-Laws called me and is referring it to a pollution dept.
Seawall experiment
We need to extend the retaining walls in the Tamaki Estuary and I don’t want to have to lug a bunch of stone down there so I thought ‘what if we use the mud to make concrete blocks?’ It makes sense right? Use the product from the erosion problem (mud) to fix itself.
I got advice from a chemical engineer who thought ‘as long as I don’t use any rebar I should be ok with the salt water’. He also gave me a mix to try which I adapted to fit the local conditions:
- 10% Ordinary Portland cement
- 10% Mc Donalds fine lime
- 80% Mud
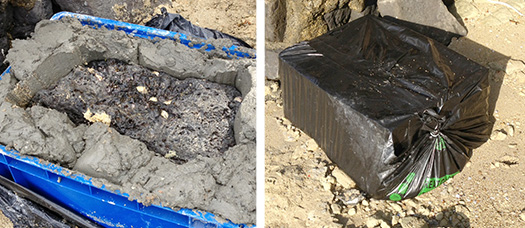
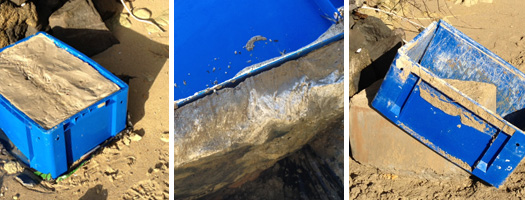
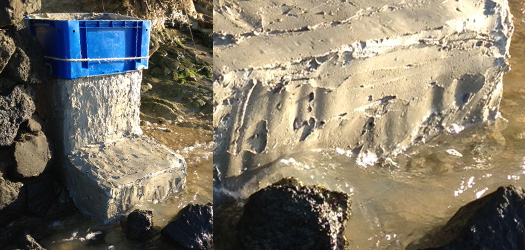
I premixed the cement and lime so I did not have to lug the 25 kg bags on site. I bought a 45 litre bolt box to use as a mould. I put the whole thing in a plastic bag to cure as I am working below the high tide mark (concrete does not need air to cure). Things I learnt:
- Mixing takes ages, I was very thorough but this took an hour!
- The first block will not sit on flat ground so you need to add more cement and lime (I did not have any more so I put a large stone in the middle of this block).
- I tried to keep the mix as dry as possible for as long as possible. One advantage of this method meant I could pull any crabs out that I accidentally scooped up.
- Multi coloured mud helps you monitor your mix. It looks like mine had a lot of clay in it, which makes sense given the eroding banks are clay.
- Update 2018: Mudcrete is a thing
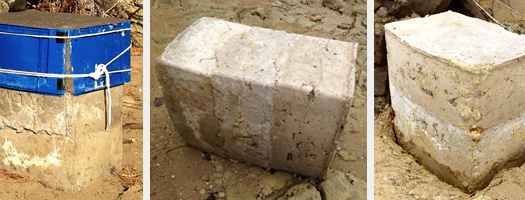
UPDATE: 5 DAYS
UPDATE: 26 DAYS

UPDATE: 3 MONTHS


One thing I quite like about this mix is the lime, which is a much more environmentally friendly product than cement. Tho the engineer has told me ‘If it’s not strong on compressive strength, increase the cement and reduce the lime’.
Let’s see if it turns into a rock or not. I am optimistic because of the clay but I am worried because concrete is usually made of sand. The engineer reckoned it might take a month!
UPDATE: 18HRS: Its solidifying! It feels like brand new plasticine. My 30kg son was able to stand on the block without leaving much of a dent. The bag has worked well and I am confident if it came off now the impact from the sea would be negligible.
UPDATE: 9DAYS

UPDATE: 48HRS After Mixing

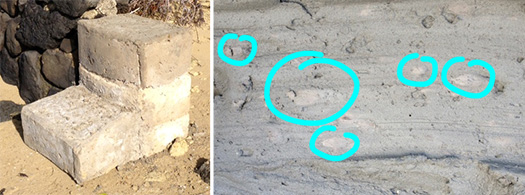
UPDATE: Third Brick
When I pushed it over it did not break up at all! Even tho the top brick was still very soft at only 5 days old. The bottom bricks are rock hard.
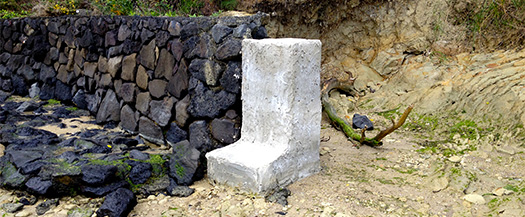
UPDATE: Fourth & Fifth Bock
This is all I need to do for the experiment but I am keen to go one or two blocks higher. I was short on time doing these last blocks so the mix was not that good, I am worried the sea will eat them away leaving me with swiss cheese bricks.
UPDATE: Icing
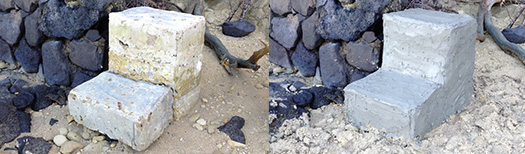
It’s been 3 months and the blocks have held together against the sea no sweat. The swiss cheese does not look good though so I have added a coat of 20% PC, 20% Lime, 60% Mud.
UPDATE: Infill Brick
UPDATE: Another wall

UPDATE: 7 Months later

UPDATE: 8 Months later
UPDATE: 3 Years 5 Months later (August 2016)
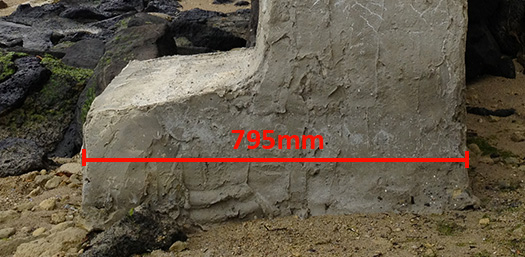
The front bit has broken off, probably from people walking on it when the supporting mud it was sitting on got eroded away (I should have built a footing). It has stood up surprisingly well to erosion, the front bit is 390mm and the back 375mm a total of 765mm. So it’s loosing about 0.8mm per month. It’s in the waves for at least two hours per day. Not bad for a first try, and a heck of a lot better than the bank behind it! It’s kind of nice to see algae growing on it, I think I would like to find out if bivalves will grow on it if I moved it (maybe just the broken off bit) further out into the estuary. Bivalves might also help prevent it from eroding. I think this kind of mud sequestration is a great way to deal with legacy sediment, I want to create more prototypes.
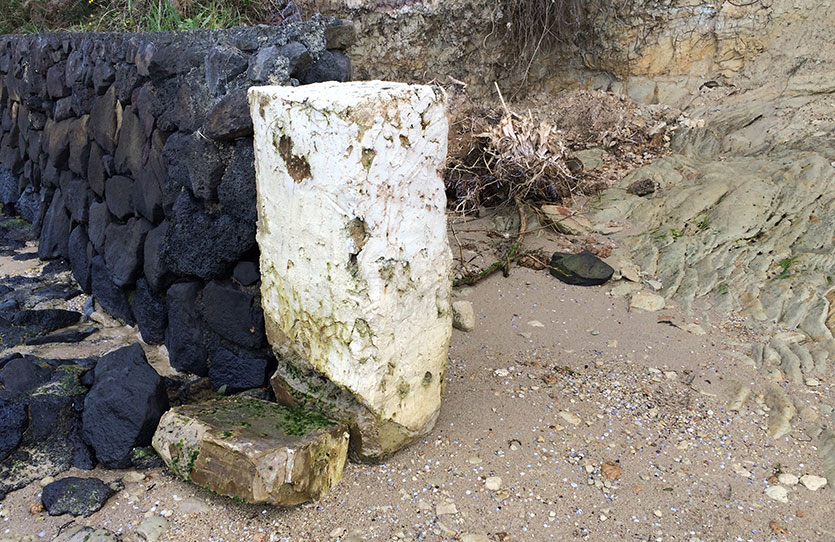
UPDATE: 6 Years later (February 2019)

The rate of erosion seems to have slowed down a lot.


UPDATE: 10 Years later (February 2023)

Map of Tamaki erosion sites
View Tamaki erosion sites in a larger map
After a very muddy swim, my son (8yrs old) and I have started mapping local erosion areas. It looks like there are lots of obvious places where we can fix tracks, plant trees and build retaining walls. I would like to help get the silt and mud out of the Hauraki Gulf.
Check out a large version of the map here